
If you are looking for a tool to smooth out rough surfaces, you might be wondering which type of sander is better: orbital or finishing. Both sanders have their pros and cons, and the best choice depends on your project and preferences. In this article, we will compare orbital and finishing sanders in terms of performance, versatility, ease of use, and cost. We will also give you some tips on how to use them effectively and safely.
The main difference between orbital and finishing sanders
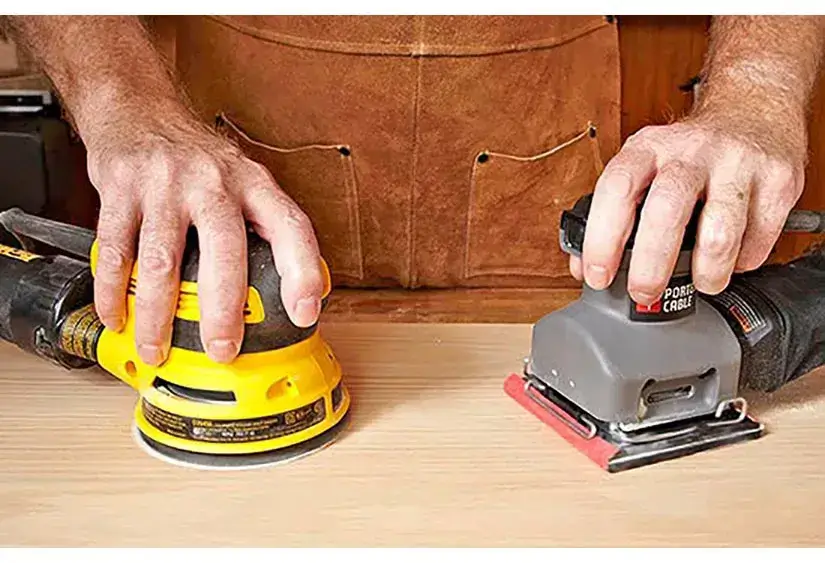
The main difference between orbital and finishing sanders is the way they move the sandpaper. An orbital sander has a circular pad that rotates and vibrates, creating a random orbital motion. A finishing sander has a rectangular pad that moves back and forth, creating a linear motion.
The orbital motion of an orbital sander allows it to remove more material faster and create a smoother finish. It also reduces the risk of leaving swirl marks or scratches on the surface. However, an orbital sander can be more difficult to control and may cause gouges or unevenness if not used properly.
The linear motion of a finishing sander makes it easier to control and follow the grain of the wood. It also produces less dust and noise than an orbital sander. However, a finishing sander is slower and less aggressive than an orbital sander, and may leave visible sanding marks or streaks on the surface.
How to choose the best sander for your project
The best sander for your project depends on several factors, such as the size, shape, and condition of the surface, the level of smoothness and quality you want to achieve, and the amount of time and effort you are willing to spend. Here are some general guidelines to help you decide:
- If you are working on a large, flat, and rough surface, such as a floor, a table, or a door, an orbital sander is a better option. It will help you remove more material faster and create a finer finish. You can also use different grits of sandpaper to adjust the level of aggressiveness and smoothness.
- If you are working on a small, curved, or delicate surface, such as a molding, a trim, or a furniture detail, a finishing sander is a better option. It will give you more control and precision and allow you to follow the contours and grain of the wood. You can also use finer grits of sandpaper to achieve a polished look.
- If you are working on a medium-sized, moderately rough surface, such as a cabinet, a shelf, or a chair, you can use either an orbital or a finishing sander, depending on your preference and budget. You can also use both sanders in combination, starting with an orbital sander to remove the bulk of the material and finishing with a finishing sander to refine the surface.
How to use orbital and finishing sanders effectively and safely
Regardless of which type of sander you choose, there are some tips and precautions you should follow to ensure a successful and safe sanding experience. Here are some of them:
- Always wear protective gear, such as goggles, gloves, and a dust mask, when using a sander. Sanding can produce a lot of dust and debris, which can irritate your eyes, skin, and lungs. You should also work in a well-ventilated area and use a vacuum or a dust collector to minimize the dust.
- Always read the manual and follow the instructions of your sander. Different models and brands may have different features and specifications, such as speed, power, and weight. You should familiarize yourself with your sander and learn how to operate it properly and safely.
- Always use the right type and size of sandpaper for your sander and your project. Sandpaper comes in different grits, which indicate how coarse or fine the sandpaper is. The lower the grit number, the coarser the sandpaper, and the more material it will remove. The higher the grit number, the finer the sandpaper, and the smoother the finish it will create. You should also make sure that the sandpaper fits your sander’s pad and is securely attached to it.
- Always start with a low speed and a coarse grit and gradually increase the speed and decrease the grit as you progress. This will help you avoid damaging the surface or the sander and achieve a consistent and smooth finish. You should also avoid applying too much pressure or staying in one spot for too long, as this can cause overheating, burning, or gouging.
- Always sand in the direction of the grain of the wood, especially with a finishing sander. This will help you avoid cross-grain scratches and enhance the natural beauty of the wood. You should also wipe off the dust between each sanding pass and check the surface for any defects or imperfections.
Conclusion
Orbital and finishing sanders are both useful tools for smoothing out rough surfaces, but they have different strengths and weaknesses. The best sander for your project depends on the size, shape, and condition of the surface, the level of smoothness and quality you want to achieve, and the amount of time and effort you are willing to spend. You should also follow some tips and precautions to use your sander effectively and safely. By doing so, you can enjoy the benefits of sanding and create a beautiful and satisfying result.