
Sanding is a crucial step in any woodworking project, as it smooths the surface, removes imperfections, and prepares the wood for finishing. But how do you choose the best method for sanding? Should you use a power sander or sand by hand? The answer depends on several factors, such as the size, shape, and complexity of the project, the type and condition of the wood, and the desired outcome. In this article, we will compare the pros and cons of sanding by hand and with a power sander, and provide some tips and tricks to help you achieve the best results.
The correct answer: It depends on the project
The correct answer to the question of whether it is better to sand by hand or with a power sander is: it depends on the project. There is no one-size-fits-all solution for sanding, as different projects require different approaches. Some general guidelines are:
- Use a power sander for large, flat, or curved surfaces that need a lot of material removal or a uniform finish. Power sanders are faster, more efficient, and less tiring than sanding by hand. They can also create a smoother and more consistent surface, especially when using a random orbital sander. However, power sanders can also be noisy, messy, and expensive. They can also damage the wood if used incorrectly or with the wrong grit of sandpaper. Power sanders are not suitable for intricate, detailed, or hard-to-reach areas, as they can remove too much material or cause unevenness.
- Use hand sanding for small, delicate, or complex projects that require more control, precision, or finesse. Hand sanding is quieter, cleaner, and cheaper than using a power sander. It also allows you to feel the wood and follow its grain, which can enhance the natural beauty and character of the wood. However, hand sanding can also be slow, tedious, and exhausting. It can also create scratches or swirl marks if done improperly or with the wrong grit of sandpaper. Hand sanding is not suitable for large, rough, or uneven surfaces, as it can take too long or produce poor results.
How to choose the best sandpaper for wood
Whether you sand by hand or with a power sander, choosing the right sandpaper for wood is essential for achieving a smooth and flawless finish. Sandpaper is graded by its grit, which indicates how coarse or fine it is. The lower the grit number, the coarser the sandpaper; the higher the grit number, the finer the sandpaper. The grit of sandpaper affects how much material it removes, how smooth it makes the surface, and how visible the scratches are.
The best sandpaper for wood depends on the type and condition of the wood, the stage of sanding, and the desired finish. In general, you should start with a coarser grit and work your way up to a finer grit, using progressively lighter pressure. This will remove the major defects, such as paint, stains, scratches, dents, or roughness, and create a smooth and even surface. The final grit you use will depend on the type of finish you plan to apply. For example, if you are going to paint the wood, you may stop at 150-grit or 180-grit sandpaper, as the paint will cover the minor scratches. If you are going to stain or varnish the wood, you may go up to 220-grit or 320-grit sandpaper, as the stain or varnish will accentuate the scratches.
Here are some common grits of sandpaper for wood and their uses:
- 60-grit to 80-grit: Extremely coarse sandpaper for removing large amounts of material, such as paint, stain, or rough wood. Use with caution, as it can create deep scratches or gouges that are hard to remove.
- 100-grit to 150-grit: Medium sandpaper for general-purpose sanding, smoothing, and shaping wood. Use for most projects, unless the wood is already smooth or very delicate.
- 180-grit to 220-grit: Fine sandpaper for finishing and preparing wood for painting, staining, or varnishing. Use for most types of wood, unless they are very hard or dense.
- 320-grit to 400-grit: Ultra-fine sandpaper for polishing and creating a glass-like surface. Use for very hard or dense wood, such as ebony, maple, or cherry.
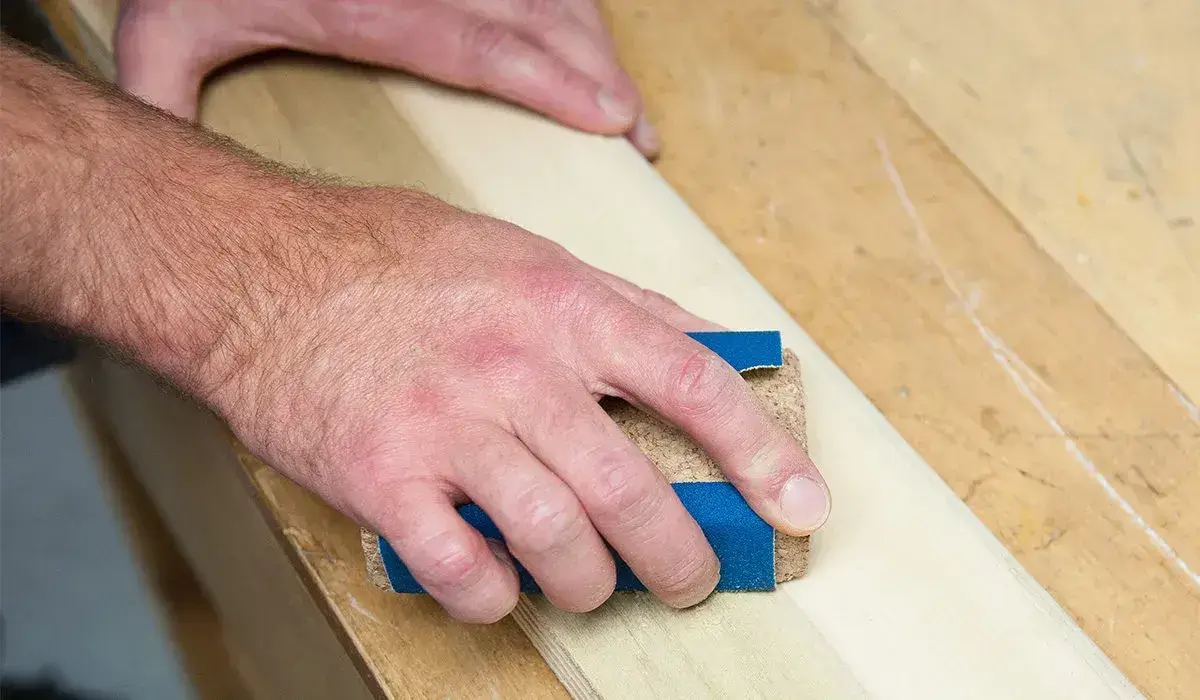
How to use a sanding block for hand sanding
One of the most important tools for hand sanding is a sanding block. A sanding block is a piece of wood, foam, cork, or rubber that holds the sandpaper and distributes the pressure evenly. A sanding block helps you sand faster, easier, and more effectively than using a folded piece of sandpaper. It also prevents the sandpaper from slipping, tearing, or wrinkling, and reduces the risk of creating scratches or swirl marks.
To use a sanding block, you need to cut a piece of sandpaper slightly larger than the block and wrap it around the block. You can use spray adhesive, staples, or tape to secure the sandpaper to the block. Alternatively, you can buy pre-cut sandpaper sheets or rolls that fit the block. You should change the sandpaper when it becomes worn, clogged, or torn.
To sand with a sanding block, you need to hold the block firmly and move it along the direction of the wood grain. You should apply even and moderate pressure, and avoid pressing too hard or too lightly. You should also sand the entire surface evenly, and avoid sanding the same spot for too long. You should check the surface frequently for smoothness and defects, and wipe off the dust with a cloth or a tack cloth.
How to use a power sander for sanding wood
There are many types of power sanders for sanding wood, such as belt sanders, orbital sanders, random orbital sanders, detail sanders, and drum sanders. Each type of power sander has its own advantages and disadvantages, and is suitable for different projects and purposes. However, some general tips and tricks for using a power sander are:
- Choose the right type and size of power sander for the job. For example, use a belt sander for large, flat, or rough surfaces; use a random orbital sander for curved, contoured, or smooth surfaces; use a detail sander for corners, edges, or intricate areas.
- Choose the right grit of sandpaper for the power sander. For example, use a coarser grit for faster material removal or a finer grit for smoother finish. You can also use different grits of sandpaper for different stages of sanding, starting with a coarser grit and ending with a finer grit.
- Attach the sandpaper to the power sander securely and correctly. For example, use a hook-and-loop system, a clamp, or a self-adhesive backing. Make sure the sandpaper is flat, smooth, and aligned with the sander. Replace the sandpaper when it becomes worn, clogged, or damaged.
- Plug in the power sander and turn it on. Hold the power sander firmly and comfortably, and let it reach its full speed before touching the wood. Move the power sander slowly and steadily along the direction of the wood grain. Do not press too hard or too lightly, and do not tilt or twist the power sander. Keep the power sander in constant motion, and avoid staying in one spot for too long. Turn off the power sander and lift it off the wood before stopping it. Check the surface frequently for smoothness and defects, and vacuum or blow off the dust.
Conclusion
Sanding is an essential skill for any woodworker, as it can make or break the quality and appearance of the final product. Whether you sand by hand or with a power sander, you need to choose the right method, tool, and sandpaper for the job, and use them properly and safely. By following the tips and tricks in this article, you can sand wood like a pro and achieve a smooth and flawless finish.