
Sanding a door is a common DIY project that can improve the appearance and functionality of your door. Whether you want to paint, stain, or refinish your door, sanding is an essential step to prepare the surface and remove any imperfections. However, sanding a door can also be a tedious and time-consuming task, especially if you have a large or intricate door. How can you sand a door quickly and easily without compromising the quality of the result? In this article, we will share some tips and tricks to help you sand a door efficiently and effectively.
The Best Way to Sand a Door
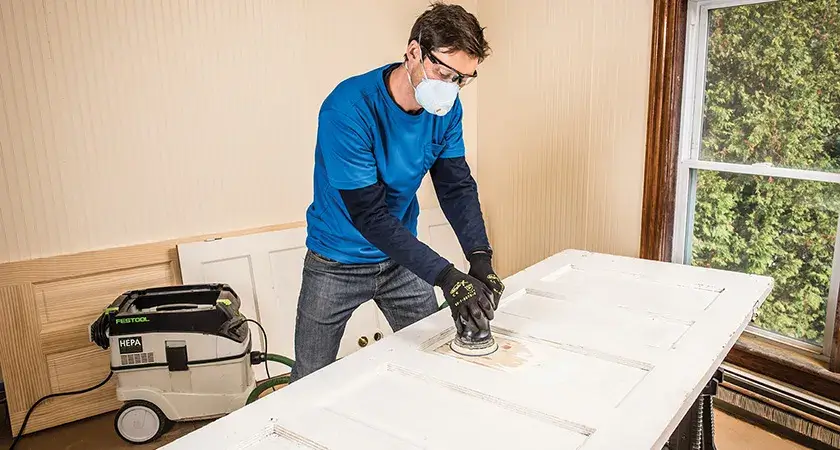
The best way to sand a door quickly is to use a power sander, such as an orbital sander or a palm sander, with the appropriate sandpaper grit. A power sander can cover a large area in a short time and create a smooth and even finish. However, you should also use a sanding block or a piece of sandpaper for the corners, edges, and details of the door, where a power sander may not reach or may cause damage. You should also sand the door in the direction of the wood grain, not against it, to avoid scratches and marks.
How to Choose the Right Sandpaper Grit
The sandpaper grit is the measure of how coarse or fine the sandpaper is. The lower the number, the coarser the grit, and the higher the number, the finer the grit. The sandpaper grit you need depends on the condition and material of your door, as well as the desired finish. Generally, you should start with a coarser grit and work your way up to a finer grit, changing the sandpaper when it becomes worn or clogged. Here are some common sandpaper grits and their uses:
- 60 to 80 grit: This is a very coarse grit that can remove a lot of material quickly. It is suitable for doors that have a lot of paint, stain, or varnish to remove, or that have deep scratches, dents, or damage. However, this grit can also leave a rough surface that may require more sanding with finer grits.
- 100 to 120 grit: This is a medium grit that can smooth out the surface and remove any minor imperfections. It is suitable for doors that have a thin layer of paint, stain, or varnish to remove, or that have light scratches, dents, or damage. This grit can also be used as a final sanding before applying a new coat of paint, stain, or varnish.
- 150 to 180 grit: This is a fine grit that can create a smooth and even finish. It is suitable for doors that have already been sanded with a coarser grit and need a final touch-up. This grit can also be used to lightly scuff the surface before applying a second or third coat of paint, stain, or varnish.
- 220 to 320 grit: This is a very fine grit that can create a polished and glossy finish. It is suitable for doors that have already been sanded with a finer grit and need a final polish. This grit can also be used to buff the surface after applying a clear coat or a wax.
How to Sand a Door Step by Step
Here are the basic steps to sand a door quickly and easily:
- Remove the door from its hinges and place it on a flat surface, such as a pair of sawhorses or a workbench. You can also sand the door while it is still hanging, but this may be more difficult and messy.
- Remove any hardware, such as knobs, hinges, or locks, from the door. You can also tape over them to protect them from the sandpaper.
- Clean the door with a damp cloth or a mild detergent to remove any dirt, dust, or grease. Let the door dry completely before sanding.
- Choose the right sandpaper grit for your door and attach it to your power sander or sanding block. Start with a coarser grit and work your way up to a finer grit, depending on the condition and material of your door and the desired finish.
- Sand the door with the power sander or the sanding block, following the direction of the wood grain. Apply even and steady pressure, but do not press too hard or move too fast, as this may cause uneven or excessive sanding. Avoid sanding over the same spot for too long, as this may create dips or gouges. Sand the entire surface of the door, including the sides and the top and bottom edges.
- Sand the corners, edges, and details of the door with a piece of sandpaper or a sanding sponge. Fold the sandpaper or the sanding sponge to fit into the tight spaces and crevices. Be careful not to sand too much or too hard, as this may damage the door or remove the details.
- Wipe the door with a tack cloth or a damp cloth to remove any sanding dust. Check the door for any spots that need more sanding or smoothing. Repeat the sanding process with a finer grit if needed, until you achieve the desired finish.
- Apply a primer, paint, stain, varnish, clear coat, or wax to the door, following the manufacturer’s instructions and recommendations. Let the door dry completely before reattaching the hardware and hanging it back on its hinges.
Conclusion
Sanding a door is a simple and rewarding DIY project that can transform the look and feel of your door. By using a power sander and the right sandpaper grit, you can sand a door quickly and easily, without compromising the quality of the result. Follow the steps above to sand a door like a pro and enjoy your new and improved door.